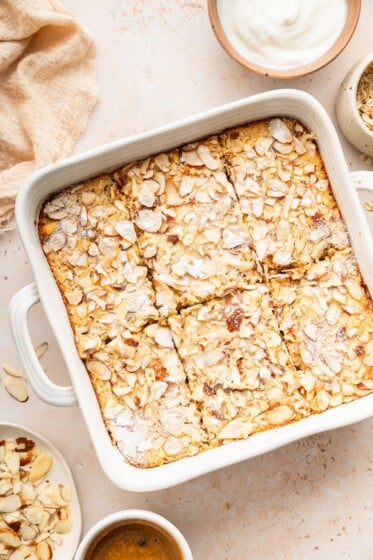
This applesauce cake is soft, moist and naturally sweetened with maple syrup. It's loaded with fall spices and topped with a delicious cinnamon cream cheese frosting.
This easy Chinese Chicken Salad recipe is a healthier spin on versions I always see at those popular food chains everyone loves. I always enjoy a hearty salad that’s healthy without being overly virtuous. Because life’s all...
This old-fashioned Apple Cake recipe is all the bits I cherish about fall—apple picking, chunky sweaters, cinnamon sticks, and crackly orange leaves—turned into a warm hug of a dessert and slathered with dreamy caramel cream cheese frosting.
Email Me the Recipe!
Enter your email below to save this recipe to your free Well Plated recipe box.
From time to time, we'll send you the best of Well Plated. We respect your privacy and you can opt out anytime. Already registered? Log in here.
Why You’ll Love This Easy Apple Cake Recipe
THE Cake for Fall. When I think about the perfect fall day, I envision crimson leaves against icy blue skies, backyard football games, and slices of fresh apple cake—and after you try this recipe, I think you’ll be on the same page. This apple cake is a moist, rich spice cake studded with tender, tart apples and bits of toasted walnuts. (And did I mention the caramel cream cheese frosting?!)
Moist, Tender Crumb. The Greek yogurt and apples both contribute to the super moist crumb of this apple cake. (We might hate the word “moist,” but you can’t deny that moist is exactly what you want in a cake recipe!)
Easy to Make. This is not a fussy layer cake or an apple pie that requires rolling out crust! This old-fashioned apple cake is an absolute dream to make, with a relatively short ingredient list and a few simple steps to put it all together.
5 Star Review
“I made this apple cake yesterday and I think it might be my new fall favorite!”
— Patti —
How to Make Apple Cake
The Ingredients
Apples. Sweet, juicy, and beloved by all. As with my Baked Apple Slices, I love using a combination of two kinds of apples for a slight variation in texture and flavor.
White Whole Wheat Flour. I used white whole wheat flour in this cake for a wholesome, whole grain twist.
Walnuts. For a toasty, nutty crunch.
Spices. Cinnamon + nutmeg + allspice = the trifecta of cozy, fall goodness.
Brown Sugar + Granulated Sugar. A combination of brown sugar and granulated sugar provides the ideal amount of sweetness and the right texture.
Eggs + Greek Yogurt. Critical components for moisture and fluffy cake texture.
Vanilla. The perfect complement to the warm spices and apples.
Cream Cheese Frosting. But not just any cream cheese frosting. CARAMEL cream cheese frosting. This fresh apple cake is special, and it deserves a special topping to match. This delicious frosting is made from cream cheese, butter, brown sugar, vanilla, salt, and powdered sugar.
The Directions
Get Started. Toast the nuts for 8 to 12 minutes, then chop them. Whisk the dry ingredients together.
Make the Batter. In a stand mixer, cream together the wet ingredients. On low speed, add the dry ingredients. Fold in the apples and part of the walnuts.
Bake the Cake. Bake the apple cake for 35 to 45 minutes at 325 degrees F.
Frost. Prepare the frosting, then spread it onto the cake once it has cooled. Finish with toasted walnuts. ENJOY!
Recipe Variations
Add Coconut and Pecans. Swap pecans in place of walnuts, and add a sprinkle of both pecans and toasted coconut on top. New topping, same warm, happy fall feeling.
Make It Nut-Free. Simply omit the walnuts. You could also swap in 1/3 cup of dried cranberries.
Swap the Frosting for Caramel Glaze. Swap the cream cheese frosting for a simple caramel glaze. Whisk together 3 cups brown sugar, 1 cup light cream, and 2 tablespoons unsalted butter in a saucepan over medium heat. Once the sugar has dissolved, stir in 1 teaspoon pure vanilla extract.
Use the Right Apples. For the best fresh apple cake, use firm, flavorful apples like Granny Smith, Cortland, Honeycrisp, or McIntosh. These varieties will hold up well during baking, and their more pronounced flavor will ensure the cake lives up to its apple-icious name.
Don’t Leave the Peel On. I do suggest that you peel apples for apple cake, because it will help create a better, smoother texture. (Apples used for a more rustic recipe, like these Hasselback Apples don’t need peeling.)
Measure the Flour Carefully. Rather than scooping the flour directly out of the bag or container, gently spoon it into the measuring cups and then level it off with a butterknife. Basically, you don’t want the flour to be compacted in the measuring cup, or you’ll end up using more than you need and your apple cake will be dry.
Place the rack in the center of your oven. Preheat the oven to 325 degrees F. Line a 9×9-inch or 8×8-inch square baking pan with parchment paper so that it overhangs two of the sides like handles. Lightly coat the parchment with nonstick spray. Set aside. Place the nuts in a single layer on an ungreased baking pan. Bake until toasted and fragrant, about 8 to 12 minutes. Do not walk away during the last few minutes (this is when nuts love to burn). Immediately transfer to a cutting board. Coarsely chop and set aside.
In a medium bowl, whisk together the white whole wheat flour, baking soda, baking powder, salt, cinnamon, nutmeg, and allspice.
In the bowl of a standing mixer fitted with the paddle attachment or a large mixing bowl, cream together the butter, brown sugar, and granulated sugar until light and fluffy, about 3 minutes. Beat in the eggs, one at a time, stopping in between each to scrape down the bowl. Beat in the Greek yogurt and vanilla extract. With the mixer on low, slowly add the dry ingredients, mixing just until evenly moistened. Fold in the apples and 1/2 cup of the toasted chopped walnuts. The batter will be very thick.
Scrape the batter into the prepared pan and with the back of a spatula, spread it evenly. Bake until a toothpick inserted into the center comes out clean and the edges are light golden brown, about 35 to 45 minutes. The baking time will vary depending upon the moisture content of your apples. The center of the cake will still feel soft but should spring back just a little when touched. Check at the 35-minute mark. If your cake isn’t done but the top is browning more quickly than you would like, loosely tent it with foil, then continue baking as directed. When it’s done, place the pan on a wire rack and let cool completely before frosting.
To make the frosting: In a mixing bowl or a stand mixer fitted with the paddle attachment, beat the cream cheese, butter, and brown sugar at medium speed until creamy, about 1 to 2 minutes. Add the vanilla and salt and beat until blended. Reduce the mixer speed to low. Gradually add the powdered sugar, beating just until combined. Increase the mixer speed to high. Beat 1 additional minute or until smooth. Spread the frosting generously onto the cooled cake. Sprinkle the remaining walnuts over the top. Slice generously and serve.
Video
Notes
TO STORE: Store leftovers in an airtight container in the refrigerator for up to 5 days. (I find it tastes even better and more moist on day two! Let come close to room temperature prior to serving.)
TO FREEZE: Freeze (frosted or unfrosted) for up to 1 month. Let thaw overnight in the refrigerator.
Inspired by Chick-Fil-A, this kale crunch salad comes together in about 10 minutes for a simple side salad. Curly kale and green cabbage are tossed in a sweet and tangy apple cider maple vinaigrette and topped with roasted almonds.
This creamy Shrimp Salad recipe is going to shake up your lunch routine! Packed with protein, popping with flavor and texture, and perfect for tucking into lettuce wraps, it’s an easy recipe that delivers something a little different.
Why You’ll Love This Cold Shrimp Salad Recipe
Creamy Protein-Packed Salad. This shrimp salad is in the same vein of Chicken Salad, Ham Salad, and Salmon Salad. Basically, a protein combined with a creamy dressing, herbs, and fresh veggies for texture, color, and flavor. Instead of finely chopped meat or seafood, the shrimp here are whole, which adds a different texture to the salad.
Loaded with Flavor. With pickles, fresh herbs, veggies, and lemon juice for brightness, this cold shrimp salad is unexpectedly vibrant and flavorful.
Easy to Make. This recipe can be whipped up in minutes! Shrimp cooks quickly (as we know from Garlic Butter Shrimp), so it’s really just a matter of chopping the veggies and mixing the dressing.
Great for Meal Prep. Shrimp salad is PERFECT for meal prep! Since there are so many different ways to serve it, you can have it for a few days and it will never get boring.
How to Make Shrimp Salad
The Ingredients
Large Shrimp. Peel and devein them; I like to use a paring knife for deveining because it’s just the right size.
Plain Greek Yogurt. A tangier, higher protein alternative to mayo. You can use low-fat or full-fat.
Dill Pickles. These jazz up the flavor and add some texture too.
Lemon Juice. Use freshly-squeezed lemon juice, which is much more vibrant than bottled.
Whole-Grain Mustard. Another big flavor that adds some sharpness and pop.
Yellow Bell Pepper. Or red or orange bell pepper; don’t use green. We want a sweet pepper here!
Green Onions. These add some onion flavor without being overpowering.
Fresh Herbs. Chives, dill, tarragon, or a combination of these.
The Directions
Poach the Shrimp. Add them to boiling salted water and cook until they turn pink and curl into a loose C-shape.
Drain. Transfer to an ice bath, then once the shrimp are cooled, drain and dry.
Make the Dressing. Stir everything together until smooth.
Combine. Add the shrimp and veggies to the bowl with the dressing.
Finish. Stir to combine, then add the herbs and stir again. Serve or chill for later and ENJOY!
How to Serve Shrimp Salad
On crackers. Choose large crackers and spoon a shrimp with some of the dressing onto them.
In lettuce cups. Bibb or butter lettuce work great here! Spoon the cold shrimp salad into the lettuce leaves for a low carb lunch.
On sandwiches. Use crusty bread or rolls and stuff them with the shrimp salad.
In pitas or wraps. Tuck the shrimp into pita pockets, or wrap them in tortillas or lavash with baby spinach or other greens.
On a bed of greens. Add some protein to bagged salad greens by adding shrimp salad. Throw some cubes of avocado in there too to make it extra filling!
Recipe Tips and Tricks
Know How to Thaw Shrimp. If you’re using frozen shrimp, be sure to thaw them first. Place the shrimp in a bowl of cold water and let them sit for 10-15 minutes until completely thawed. (Yes, it’s counterintuitive, but you do want to use cold water, not warm!)
Don’t Overcook the Shrimp. Be careful not to overcook the shrimp, as they can become rubbery. Cook them just until they turn pink and curl into a loose C-shape. If the tails and heads are touching (i.e., the C closes into an O-shape), they’re overcooked.
Make Sure the Shrimp Are Dry After Draining. This will prevent the dressing from becoming watery and bland!
Chop the Shrimp if Desired. If you can only find jumbo shrimp or if you want a chopped shrimp salad for sandwiches and such, you can chop or dice the shrimp before combining them with the dressing.
1yellow bell pepper¼-inch diced (or red or orange bell pepper)
2green onionsvery thinly sliced
3tablespoonsminced fresh chives, dill, tarragon, or a mix
Instructions
Bring a large pot of salted water to a boil. Prepare an ice bath by filling a large bowl with ice water and keep near the stove. Add the shrimp to the water all at once and cook until they just turn pink and curl into a C shape, about 2 minutes. Immediately transfer the shrimp to the ice bath using a spider or fine mesh strainer. Chill the shrimp fully, then drain and pat dry.
Meanwhile, in a medium bowl, combine the yogurt, pickles, lemon juice, olive oil, mustard, salt, and pepper until smoothly incorporated.
Place the shrimp in a large bowl along with the bell pepper and green onions. Add the dressing, stir gently to combine, then stir in the chives or dill. Serve immediately or cover and refrigerate until ready to serve, up to 1 day.
Notes
*You can use fully cooked store-bought shrimp, just skip step one, and thaw if necessary (note that frozen, precooked shrimp will not have the best flavor; it’s worth it to cook your own)
*If you can only find jumbo shrimp, roughly chop them after cooking and cooling
TO STORE: Shrimp salad will last for up to 3 days stored in an airtight container in the refrigerator, although if you’re making it for a party, I recommend making it no more than 1 day in advance for maximum freshness.